Renter-Friendly Kitchen Makeover: How to Upgrade Your Space Without Losing Your Deposit
Introduction
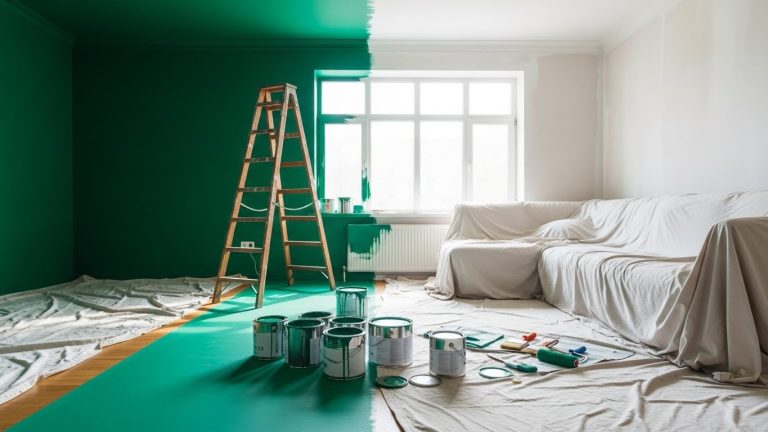
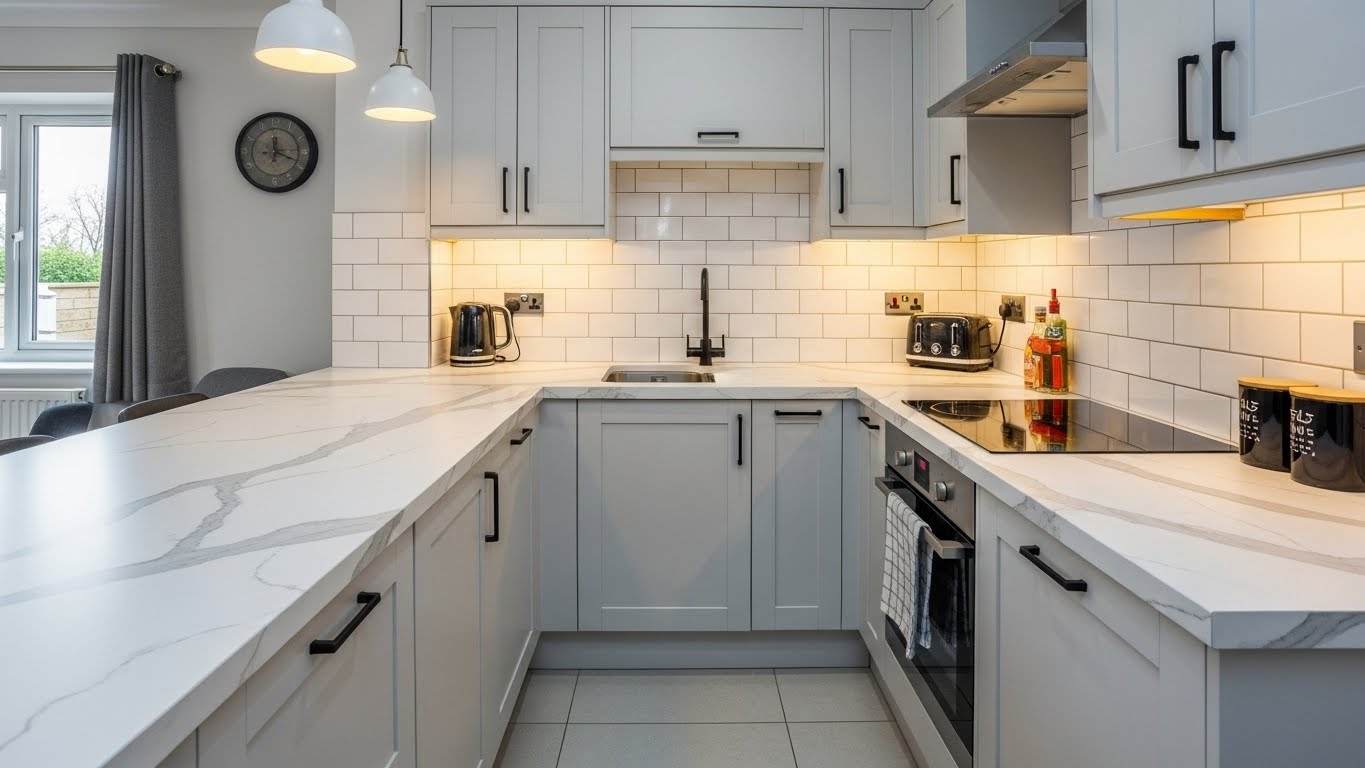
Starting a renter-friendly kitchen makeover usually begins with a deep sigh of frustration. I vividly remember signing the lease for my dream apartment in the city. The location was perfect, the windows were huge, but the kitchen looked like it was trapped in a 1980s time loop. The cabinets were a nauseating shade of “honey oak” orange, the countertops were stained beige laminate, and the lighting made everything look like a hospital waiting room.
I felt stuck. I wanted to cook in a space that inspired me, but my lease explicitly stated: “No permanent alterations allowed.” I was terrified that if I hammered a single nail or painted a wall, I would lose my $2,000 security deposit. But living in a space you hate takes a toll on your mental health. So, I decided to become a “temporary renovation” expert. I discovered that with the right adhesive technology and a little creativity, you can completely transform a room and then peel it all away on moving day like it never happened.
In this comprehensive 1200-word deep dive, I will teach you the art of the “reversible remodel.” We will cover how to cover ugly countertops with marble vinyl, install a fake backsplash that looks like real tile, and execute a renter-friendly kitchen makeover that will make your landlord ask you for design advice.
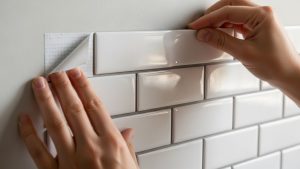
1. The Magic of Peel-and-Stick Backsplash
The backsplash is the focal point of any kitchen. If you are stuck with plain drywall or dated floral tiles, it brings the whole room down. Enter Peel-and-Stick Tiles. These are not the cheap stickers of the past. Modern versions are made of gel or vinyl that mimic the texture and shine of real glass or ceramic subway tiles.
How to Choose the Right Ones:
-
Heat Resistance: This is crucial. If you are placing them behind the stove, ensure the packaging says “Heat Resistant” or “Stove Safe.” Cheap vinyl will melt or curl.
-
The “Epoxy” Look: Look for “3D Gel” tiles. They have a raised surface. When the light hits them, they reflect it just like real grout and tile.
Installation Hack: Clean your walls with a degreaser (like TSP or simple dish soap) first. Kitchen walls are covered in invisible cooking grease. If you stick tiles on grease, they will fall off in a week. According to design experts at Apartment Therapy, prepping the surface is 90% of the battle for temporary wallpaper or tiles.
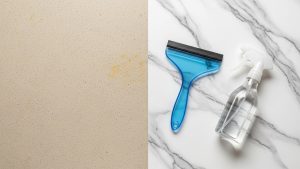
2. Covering the Ugly Countertops: Contact Paper Mastery
If you have those generic, speckled laminate countertops that look dirty even when they are clean, Contact Paper (specifically wide-width vinyl) is your savior. You can turn ugly beige laminate into “Carrara Marble” or “Butcher Block” for under $50.
The “Water Method” (Don’t Apply Dry!): Most people try to stick the vinyl on dry, get massive air bubbles, and quit. Here is the pro secret:
-
Mix water with a few drops of dish soap in a spray bottle.
-
Spray your countertop until it is soaking wet.
-
Lay the sticky vinyl on top. Because it is wet, it won’t stick immediately. You can slide it around to position it perfectly.
-
Use a squeegee (or a credit card) to push the water out from the center to the edges. As it dries, the adhesive locks in place. Bubble-free guarantee.
Durability Note: This isn’t granite. You cannot put a hot pan directly on it, and you shouldn’t chop vegetables on it. Treat it like a veneer. Use trivets and cutting boards religiously.
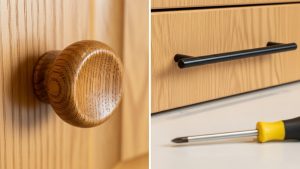
3. The Hardware Swap: The Jewelry of the Kitchen
Cabinet knobs and drawer pulls are like the jewelry of the kitchen. Old rental units usually have rusty hinges or cheap, round wooden knobs that catch on your pockets. Swapping them out is the easiest, fastest upgrade you can do.
The Strategy:
-
Measure the “Center-to-Center”: If you have handles with two screws, measure the distance between the holes exactly. You must buy new handles with the exact same spacing, or you will have to drill new holes (which is a lease violation).
-
The “Ziploc Rule”: As soon as you unscrew the old handles, put them all in a Ziploc bag. Tape that bag to the back of the undersink cabinet or put it in your “Moving Day” box. You must put the ugly old ones back before you move out to get your deposit back.
I swapped my dated silver knobs for matte black modern pulls ($30 on Amazon). It instantly made the cheap orange cabinets look intentional and industrial-chic.
4. Lighting: Banishing the Shadows
Rental kitchens are notoriously dark. The single overhead fluorescent light casts shadows on the counter where you are trying to chop veggies. You don’t need an electrician to fix this. You need Under-Cabinet Puck Lights.
Types to Buy:
-
Battery Operated: Easy, but you burn through batteries.
-
Rechargeable USB: Better, simply take them down and charge them once a month.
-
Motion Sensor: The best. They turn on when you reach for a knife and turn off when you leave.
Stick them under your upper cabinets using Command Strips (which remove cleanly). The warm glow on your countertops makes the kitchen feel expensive and functional. Lighting designers often cite “layered lighting” as the key to luxury interiors, and this hack mimics high-end hardwired systems for a fraction of the cost.

5. Dealing with the Cabinets: To Wrap or Not to Wrap?
If your cabinets are physically damaged or an unbearable color, you have two options. Option A: Electrical Tape (For details) If the cabinets have weird grooves or inlays, use colored electrical tape (like matte black) to create geometric patterns over the dated wood. Option B: Full Vinyl Wrap This is advanced. You can wrap the cabinet doors in matte white vinyl. However, this takes hours and requires patience. Option C: Remove the Doors (Open Shelving) If the upper cabinets are hideous inside and out, take the doors off completely! Store them safely (under your bed or in a closet). Line the shelves with nice paper and display your best dishes. Boom—instant trendy “open shelving.”
6. Organization as Decor
In a rental, you often lack storage. This means clutter on the counters, which ruins the look. If you can’t build a pantry, buy uniform storage. Pour your pasta, rice, and flour into matching glass jars or clear plastic containers. Display them on the counter. Suddenly, your groceries look like decor. A row of matching jars looks intentional and high-end, whereas a pile of cardboard boxes looks messy. Use a Tension Rod under the sink to hang spray bottles and clear up floor space.
Frequently Asked Questions (FAQs)
Q: Will contact paper leave a sticky residue? A: Sometimes. If it does, don’t panic. Buy a bottle of “Goo Gone” or use lemon essential oil. The adhesive residue wipes right off. It won’t permanently damage laminate or wood.
Q: Can I paint the cabinets if I promise to paint them back? A: NEVER assume this. Painting wood cabinets is often irreversible (you can’t un-paint wood grain). Always get written permission from your landlord before painting. If they say no, stick to vinyl wrapping.
Q: Is this expensive? A: A full makeover usually costs:
-
Tiles: $50-80
-
Counter Contact Paper: $30
-
Hardware: $30
-
Lights: $25
-
Total: Under $200.
Q: Does the “water method” work for the backsplash too? A: No. Only for non-porous surfaces like countertops. For walls, apply dry, as the water might damage the drywall or paint.
Conclusion
Executing a renter-friendly kitchen makeover is about reclaiming your power. Just because you don’t own the deed to the house doesn’t mean you can’t own the experience of living there. You deserve a beautiful space now, not just in some hypothetical future where you buy a home. So buy the contact paper, save the old knobs, and turn that temporary kitchen into a place where you actually want to cook.