How to Create a Gallery Wall on a Budget: The Ultimate Curator’s Guide
Introduction
Learning how to create a gallery wall is often the result of staring at a massive, blank white wall in your living room and feeling completely uninspired. I remember my first attempt vividly. I had a hammer, a bag of nails, and zero plan. I started hammering frames randomly. By the end of the afternoon, my wall looked like a piece of Swiss cheese, full of unnecessary holes, and the pictures were crooked. It didn’t look like Pinterest; it looked like a mistake.
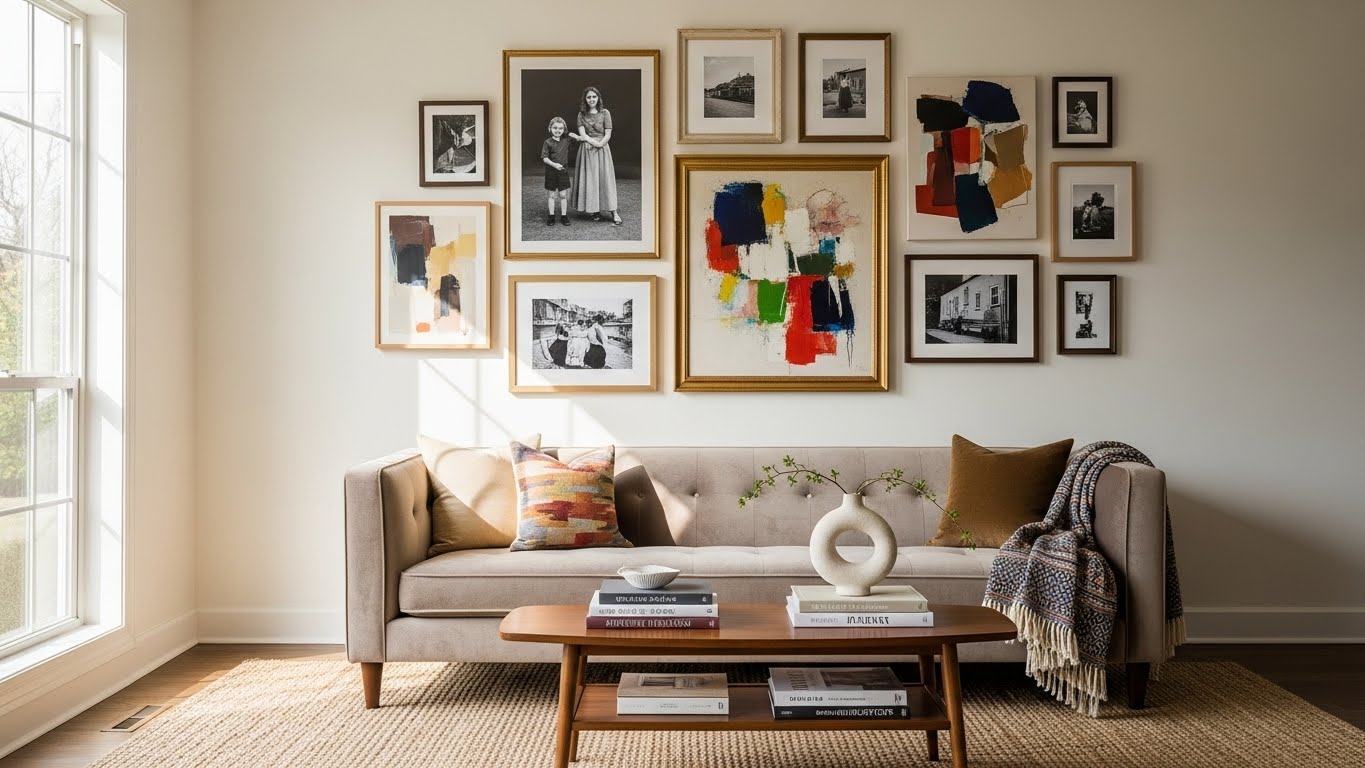
A gallery wall is more than just a collection of pictures; it is a curated visual story. It creates a focal point, adds personality, and can actually make a small room feel larger. But many people are paralyzed by the fear of messing it up. According to interior design experts at Apartment Therapy, the gallery wall remains one of the most timeless design trends because it allows for infinite personalization.
In this comprehensive 1200-word deep dive, I will teach you the museum-standard “57-Inch Rule,” the “Butcher Paper” trick that saves your drywall, and specific strategies on how to create a gallery wall that looks expensive but costs next to nothing.
1. The Hunt: Sourcing Art Without Going Broke
The biggest misconception is that you need expensive oil paintings. A gallery wall is a mix of high and low. You are curating textures and memories.
Budget Sourcing Ideas:
-
Thrift Stores: Look for frames, not the art. You can find high-quality wood frames with glass for $2. Spray paint them black or gold for a cohesive look.
-
Public Domain Art: Websites like the Smithsonian Open Access allow you to download high-resolution images of famous art for free. Print them at a local office supply store for pennies.
-
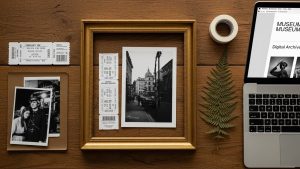
Personal Artifacts: Don’t just frame photos. Frame a concert ticket, a handwritten letter from your grandmother, or a dried flower. These items add “texture” and break up the monotony of rectangular photos.
2. The Layout: The “Butcher Paper” Method
Do not—I repeat, do not—put a nail in the wall until you have done this step. You need to visualize the layout without damaging the paint.
The Protocol:
-
Trace: Lay all your frames on a roll of kraft paper (butcher paper) or old wrapping paper. Trace the outline of each frame.
-
Cut: Cut out these paper shapes. Mark on the paper exactly where the nail hook is located on the back of the frame.
-
Tape: Use painter’s tape to stick these paper templates to your wall. Move them around. Experiment with layouts.
-
Balance: Step back. Does the left side feel “heavier” than the right? Adjust the paper until it feels balanced.
This method allows you to make 50 mistakes with tape instead of 50 mistakes with a hammer.

3. The Math: The 57-Inch Rule
Why do some gallery walls look “off”? Usually, they are hung too high. Museums and galleries use a standard formula to ensure art is at the average human eye level. The Rule: The center of your gallery wall (the focal point) should be 57 inches from the floor.
How to calculate:
-
Measure 57 inches up from the floor. Mark it lightly with a pencil.
-
This mark is where the center of your grouping should be.
-
Do not center the arrangement between the ceiling and the floor; anchor it to the human scale. If you are hanging the gallery wall above a sofa, leave 6 to 8 inches of clearance above the sofa back so you don’t hit your head.
4. Visual Weight: Anchors and Mixes
To make the wall feel professional, you need to understand “Visual Weight.” Large, dark frames feel heavy. Small, light frames feel floaty.
-
The Anchor: Place your largest, heaviest piece slightly off-center or in the middle. Build around it.
-
The Spiral: Imagine a spiral expanding from that center piece. Place smaller items in the gaps.
-
Spacing: Keep the distance between frames consistent. 2 to 3 inches is the industry standard. If they are too far apart, they look like lonely islands. If they are too close, it looks cluttered.
5. Hanging: Nails vs. Command Strips
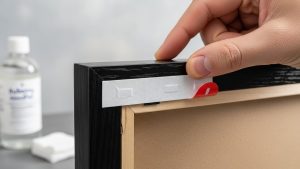
If you own your home, nails and picture hooks are secure. If you rent, or if you like to change your mind, Command Strips are a miracle. Tips for Command Strips:
-
Clean the wall with rubbing alcohol first.
-
Press the strip firmly for 30 seconds.
-
Wait 1 hour before hanging the frame. This allows the adhesive to bond. If you hang it immediately, it will fall.
-
Check the weight rating. Don’t use a strip rated for 4lbs on a heavy mirror.
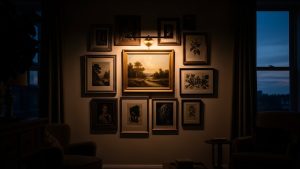
6. Lighting: The Expensive Touch
What separates a DIY wall from a high-end gallery? Lighting. You don’t need to wire electricity. Buy a battery-operated Picture Light (often remote-controlled) and mount it above your central piece. The warm glow washing over the art elevates the entire room. It creates drama and draws the eye instantly. It is the best $30 you can spend on decor.
Frequently Asked Questions (FAQs)
Q: Can I mix frame colors? A: Yes, but have a common thread. A mix of black, white, and wood is classic. Or, stick to all gold frames for a vintage look. If you mix colors, ensure the art inside has a cohesive palette (e.g., all black and white photos).
Q: How do I handle a staircase wall? A: This is tricky. Follow the angle of the stairs. Measure 57 inches up from every third step to create a diagonal guide line. Keep the frames centered on that invisible diagonal line.
Q: What if I have a textured wall? A: Command strips might not stick well to heavy texture. You might need to use nails or “brick clips” if it is a brick wall.
Q: Should I use mats in the frames? A: Yes. A mat (the white border) gives the art breathing room. It makes a $5 print look like a $500 piece. Never underestimate the power of a good mat.
Conclusion
Mastering how to create a gallery wall is an exercise in storytelling. It takes your memories and interests out of the digital cloud and puts them into your physical space. It requires a bit of math (the 57-inch rule) and a bit of patience (the paper templates), but the result is a home that feels uniquely yours. Don’t be afraid to start. Grab that roll of butcher paper today, and start visualizing your masterpiece.