Composting for Beginners: How to Turn Kitchen Scraps into Black Gold
Introduction
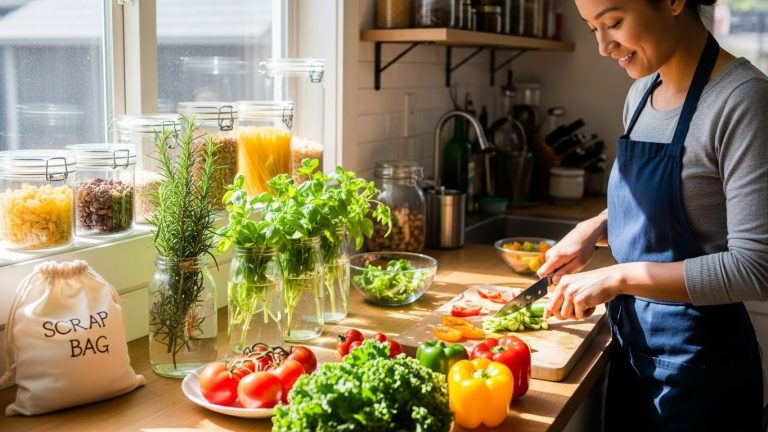
Learning composting for beginners is usually sparked by a specific kind of guilt: throwing a half-eaten salad or a basket of moldy strawberries into the trash can. You know it’s organic matter. You know it could become soil. But instead, it is heading to a landfill where it will be entombed in plastic bags, deprived of oxygen, and forced to release methane gas.
I used to think composting was only for people with massive farms and a high tolerance for bad smells. I lived in a third-floor apartment and assumed it was impossible. But after attending a workshop on urban gardening, I realized that composting is simply managing rot. It is biology, not magic. According to the Environmental Protection Agency (EPA), food scraps and yard waste make up more than 30% of what we throw away. By composting, you can divert that waste and create nutrient-rich fertilizer for your plants.
In this comprehensive 1200-word deep dive, I will explain the crucial “Greens vs. Browns” ratio, how to pass the “Squeeze Test” for moisture, and the exact methods for composting for beginners, whether you have a sprawling backyard or a tiny kitchen counter.
1. The Science: Greens (Nitrogen) vs. Browns (Carbon)
Composting isn’t just throwing trash in a pile. It is cooking for bacteria. To make the bacteria happy (and efficient), you need a balanced diet of two ingredients:
-
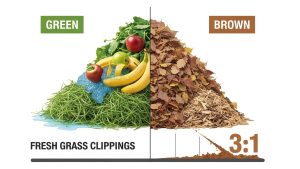
Greens (Nitrogen): These are wet, fresh materials. Vegetable peels, fruit cores, coffee grounds, tea bags, and grass clippings. They provide moisture and nutrients.
-
Browns (Carbon): These are dry, woody materials. Dried leaves, cardboard (tape removed), newspaper, sawdust, and egg cartons. They provide structure and aeration.
The Golden Ratio: A common mistake in composting for beginners is having too many greens. This creates a slimy, smelly, anaerobic mess. Aim for a ratio of 2:1 or 3:1 (Browns to Greens). Every time you add a bucket of kitchen scraps (Green), cover it with three buckets of dry leaves or shredded cardboard (Brown). This absorbs the smell and fuels the breakdown process.
2. The Method: Bin vs. Tumbler vs. Pile
How you compost depends on your space and your back pain tolerance.
-
The Open Pile: Best for large yards. You just pile it up. It is slow (6-12 months) and can attract pests if not managed well, but it is free.
-
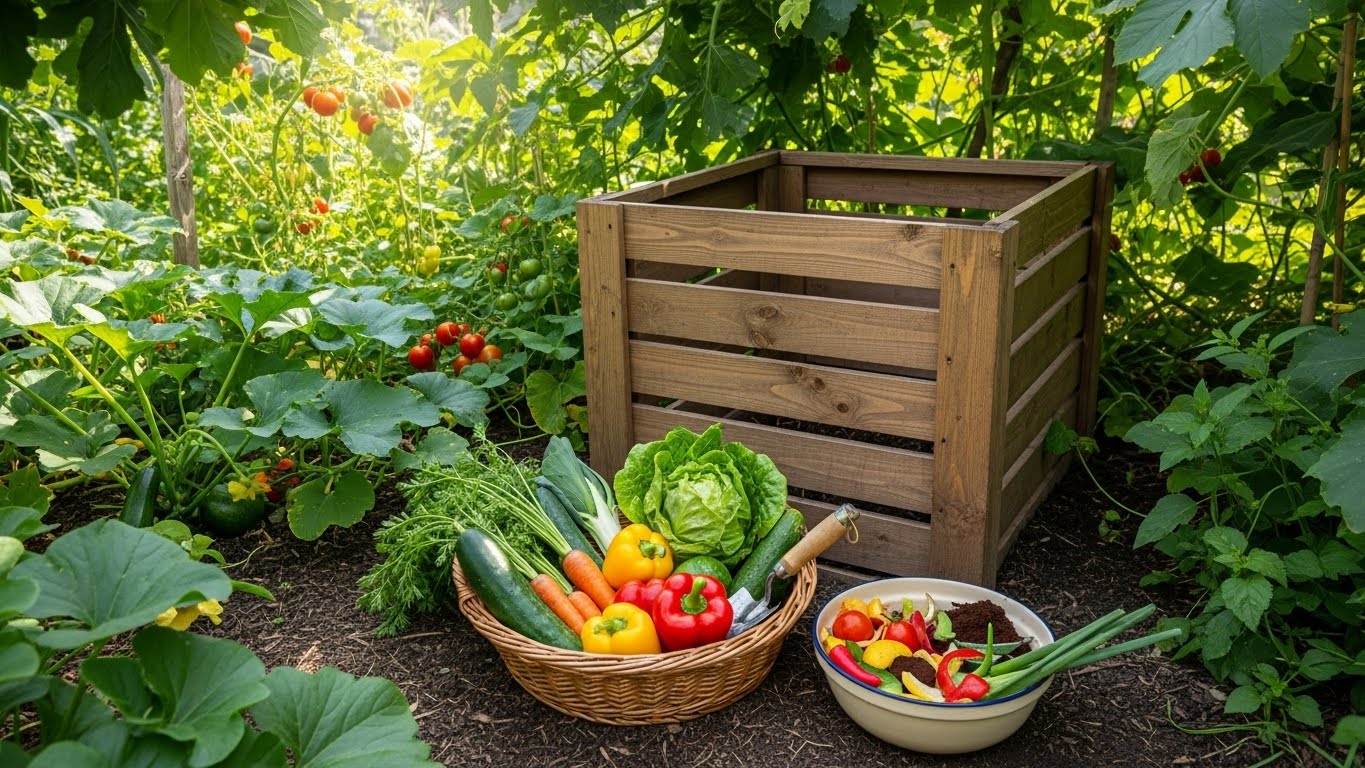
The Closed Bin: A plastic box with a lid and no bottom, sitting on the soil. Good for suburban yards. It keeps raccoons out and looks tidy.
-
The Tumbler: A barrel on a stand that spins. This is the fastest method. Because you can rotate it easily, you aerate the mix, speeding up decomposition to as little as 4-8 weeks.
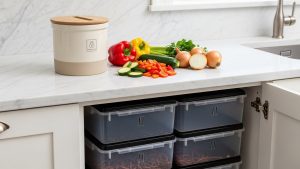
3. Apartment Solutions: Worms and Bokashi
“But I don’t have a yard!” You can still compost.
-
Vermicomposting (Worm Bin): Red Wiggler worms eat your scraps and poop out “castings” (fertilizer). A well-maintained worm bin smells like fresh earth, not garbage. Keep it under your sink.
-
Bokashi: A Japanese method using anaerobic fermentation. You put scraps (even meat and dairy) in an airtight bucket with inoculated bran. It pickles the waste. After 2 weeks, you bury the pickled waste outside or in a planter box to finish decomposing.
4. What NOT to Compost
If you put the wrong things in, you will attract rats and create a biohazard. The “No” List:
-
Meat and Dairy: They rot and smell like death, attracting pests. (Unless using Bokashi).
-
Oils and Greases: They coat the materials and suffocate the bacteria.
-
Pet Waste (Dog/Cat): Contains pathogens and parasites not killed by standard compost heat.
-
Glossy Paper: Magazines with colored ink often contain toxins.
5. The Heat Factor: Turning the Pile
Decomposition creates heat. A healthy compost pile can reach 140°F (60°C) in the center. This heat kills weed seeds and pathogens. To generate heat, the bacteria need Oxygen. The Work: Turn your pile once a week. Use a pitchfork or spin your tumbler. This introduces fresh oxygen. If you don’t turn it, the pile goes “anaerobic” (without air), and that is when it starts smelling like rotten eggs (hydrogen sulfide).
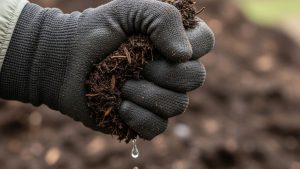
6. Troubleshooting: The Squeeze Test
Is your pile too dry? Too wet? Use the Squeeze Test. Grab a handful of the compost (wear gloves) and squeeze it.
-
Water runs out: Too wet. Add more Browns (cardboard/paper) to absorb it.
-
Crumbles apart: Too dry. The bacteria are thirsty. Add water with a hose or add more wet Greens.
-
Like a wrung-out sponge: Perfect. A few drops appear, but it holds its shape.
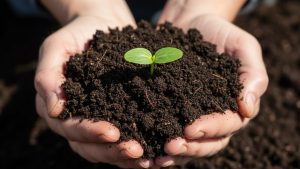
7. Harvesting “Black Gold”
How do you know when it is done? Finished compost looks like dark, crumbly soil. It smells like a forest floor after rain. You should not be able to recognize any original items (no banana peels visible). Using it:
-
Top Dressing: Sprinkle it on top of your lawn or flower beds.
-
Potting Mix: Mix 30% compost with 70% potting soil for house plants.
-
Compost Tea: Steep a bag of compost in a bucket of water for 24 hours and water your plants with the liquid nutrient boost.
According to the Cornell Waste Management Institute, using compost improves soil structure, water retention, and disease suppression in plants.
Frequently Asked Questions (FAQs)
Q: Will it smell? A: If done correctly, no. It should smell earthy. A foul smell means you have too many Greens (Nitrogen) or not enough air. Add shredded newspaper and turn the pile to fix it instantly.
Q: How long does it take? A: It depends on effort. “Hot Composting” (turning often, perfect ratio) takes 1-3 months. “Cold Composting” (just throwing stuff in a pile and leaving it) takes 6-12 months.
Q: Can I compost citrus peels? A: Yes, but in moderation. Too much acidity can slow down the bacteria (and worms hate it). Chop them up small to help them break down faster.
Q: Do I need a starter culture? A: No. The bacteria are already on the food scraps and in the air. However, throwing a shovel full of garden soil into a new bin helps inoculate it with the right microbes faster.
Conclusion
Mastering composting for beginners is the ultimate act of recycling. It closes the loop. You take energy from the earth (food), consume it, and return the nutrients to the soil to grow more food. It reduces your trash output by half and connects you to the natural cycle of decay and rebirth. Start with a small kitchen bin, save your cardboard boxes, and watch as your “trash” transforms into the most valuable thing in your garden.