DIY Pet First Aid Kit Essentials: What to Pack Before Emergency Strikes
Introduction
Building a comprehensive pet first aid kit essentials bag is something every owner intends to do, but rarely prioritizes until it is too late. I learned this lesson on a hiking trail three miles from my car. My Labrador, Cooper, stepped on a sharp piece of slate rock, slicing his paw pad open. Blood was everywhere. I panicked. I opened my backpack and realized I had nothing—no bandages, no antiseptic, not even a clean sock. I had to carry a 70-pound bleeding dog down a mountain while using my own t-shirt as a tourniquet.
That day changed how I view pet ownership. We insure our cars and lock our doors, but we often leave our pets’ safety to luck. According to the American Animal Hospital Association (AAHA), 60% of animal hospital visits are emergency in nature. When seconds count, you cannot afford to be searching through junk drawers for tweezers.
In this comprehensive 1200-word deep dive, I will guide you through building a professional-grade kit at home, explain why giving your dog Tylenol could kill them, and teach you the vital signs every owner must know to execute pet first aid kit essentials effectively.
1. The “Human Kit” Mistake: Why You Can’t Share Meds
The biggest misconception is that a standard human first aid kit is sufficient for pets. While bandages and gauze are universal, the chemical components are not.
-
Painkillers: Never, ever give your pet human pain medication without veterinary direction. Ibuprofen (Advil) and Acetaminophen (Tylenol) are toxic to dogs and cats. They can cause kidney failure and liver damage within hours.
-
Ointments: Many human antibiotic creams contain ingredients that are safe for skin but toxic if licked (and your pet will lick the wound).
Your kit needs to be specific. It needs to account for fur, claws, and the fact that your patient cannot tell you where it hurts.
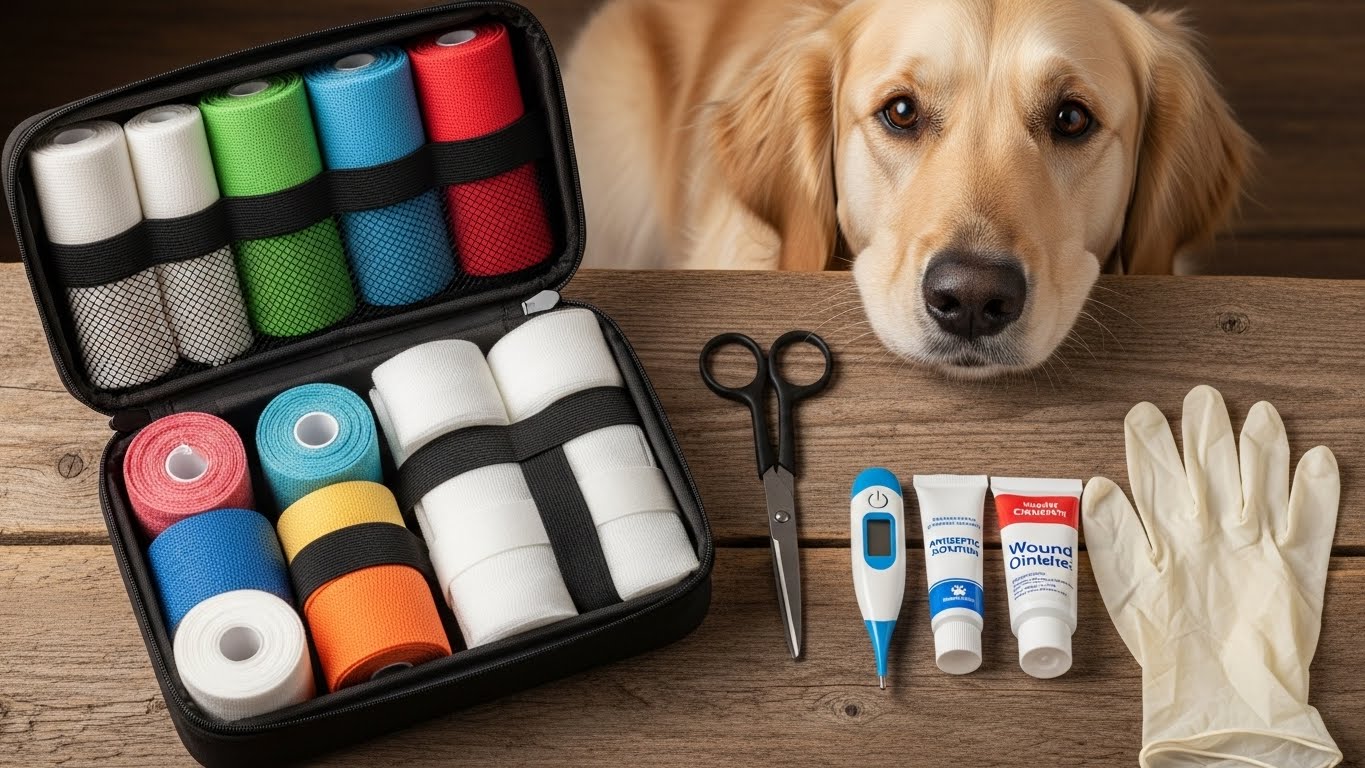
2. Wound Care: The Core of Your Kit
Cuts, scrapes, and bites are the most common injuries. To manage these, you need a multi-layer approach. Standard Band-Aids won’t stick to fur.
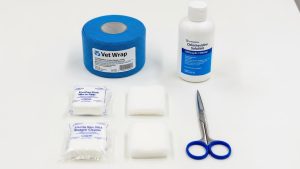
The Shopping List:
-
Non-Stick Gauze Pads: To place directly over the wound so it doesn’t stick to the blood.
-
Self-Adhering Bandage (Vet Wrap): This is the magic material that sticks to itself but not to fur. It comes in bright colors and is essential for holding gauze in place.
-
Chlorhexidine Solution: Forget alcohol (it burns) and hydrogen peroxide (it damages tissue). Chlorhexidine is what vets use to flush wounds. It is gentle and kills bacteria effectively.
-
Blunt-Tip Scissors: You need to cut tape and fur without accidentally stabbing your panic-stricken pet.
3. Poison Control: The controversial Hydrogen Peroxide
This is a specific tool for a specific job: Inducing Vomiting. If your dog eats a chocolate bar or rat poison, you have a very short window to get it out. Note: NEVER induce vomiting without calling your vet or the ASPCA Animal Poison Control Center first. Some caustic substances burn coming up and cause more damage.
However, having fresh 3% Hydrogen Peroxide and a feeding syringe in your kit is crucial if the vet gives you the green light. Activated Charcoal is another addition used to absorb toxins in the stomach, but again, professional guidance is required before administration.
4. The Vital Signs Toolset
You need to be able to tell the vet what is wrong. “He looks sick” is not helpful. “His temperature is 104°F and his gums are pale” provides actionable data.
-
Digital Thermometer: It must be a rectal thermometer. Ear thermometers are less accurate for pets. Yes, it is unpleasant, but it is necessary. Use a water-based lubricant (lubricating jelly) which should also be in your kit.
-
Flashlight: To check pupil dilation and look into throats for blockages.
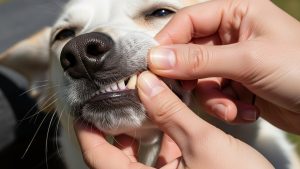
How to Check Capillary Refill Time (CRT): This tests for shock and blood flow. Lift your pet’s lip and press your finger firmly against their pink gum. It will turn white. Remove your finger. The pink color should return in under 2 seconds. If it takes longer, or if the gums are pale/grey, get to the emergency vet immediately.
5. Tick and Insect Removal
If you walk your dog in nature, ticks are a guarantee. Leaving a tick head embedded in the skin can lead to infection or Lyme disease. Do not use your fingers or burn it off with a match (old wives’ tales).
-
Fine-Point Tweezers: Or a specialized “Tick Twister” tool.
-
Magnifying Glass: To ensure you have removed the entire head.
-
Small Jar: To save the tick. If your pet gets sick later, the vet can test the tick for specific diseases.

6. The “Go-Bag” vs. Home Kit
Ideally, you should have two kits.
-
The Home Kit: A large plastic tote bin containing everything mentioned above, plus extra towels, a muzzle (pain makes even nice dogs bite), and your pet’s medical records.
-
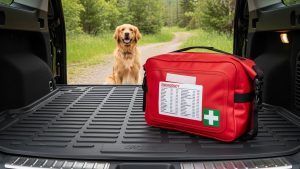
The Car/Hiking Kit: A smaller, waterproof pouch containing just the basics: Vet Wrap, gauze, antiseptic wipes, and tweezers.
I keep my hiking kit clipped to my dog’s leash. It weighs less than a pound but provides peace of mind.
7. Emergency Contact Card
In the panic of an emergency, you will forget your own phone number. Laminate a card that includes:
-
Your Primary Vet’s Name and Number.
-
The Nearest 24-Hour Emergency Vet Address.
-
ASPCA Poison Control Number: (888) 426-4435.
-
Your Pet’s Weight and any Allergies.
Tape this card to the lid of your kit.
Frequently Asked Questions (FAQs)
Q: Can I use Neosporin on my dog? A: Generally, yes, for minor scrapes. However, if they lick it off, it can upset their stomach. It is better to use a pet-specific hydrocortisone spray or antibiotic cream.
Q: How do I know if my dog is in shock? A: Look for pale gums, rapid shallow breathing, weak pulse, and cold extremities (paws/ears). Keep them warm with a blanket and drive to the vet immediately.
Q: Does pet insurance cover first aid supplies? A: No, usually insurance covers the treatment at the vet, not the preventative supplies you buy for your home. However, some wellness plans might cover flea/tick prevention tools.
Q: Can I give Benadryl to my dog? A: Often, vets recommend Benadryl (Diphenhydramine) for allergic reactions (like bee stings). However, the dosage is strictly based on weight. Ask your vet for the correct dosage now and write it on your emergency card so you don’t have to guess later.
Conclusion
Gathering your pet first aid kit essentials is an act of love. It is admitting that the world is unpredictable and choosing to be prepared rather than helpless. You hope you never have to crack open that box of gauze or use the tick remover. But if the day comes when your furry best friend needs you, you won’t be panicking—you will be reaching for the red bag, ready to save the day.